Normandy; The Beaches, Part 3, 2017

Before moving on, several reasons require a brief return to the subject of the harbors: The remnants of the British Mulberry harbor are still visible in Arromanches and make striking photographic subjects; the American and British harbors are interesting both because they were vital to the invasion's early success and because their brilliant concept was fully realized; and also - not incidentally - Arromanches has a superb restaurant with good views of the Mulberry relics.
The invasion could not have succeeded long term without rapidly landing and resupplying enough troops and equipment to repel the inevitable German counterattack and to begin the march to free the continent. The great western French ports of Le Havre and Cherbourg had been heavily damaged by Allied bombing and then German demolition, so the invasion forces had to plan for three or more months of resupply across the beaches. The complex separate elements of the two Mulberry harbors were built in secret in England and then towed into position and assembled. There were two harbors, but the fierce June storm soon destroyed the American's Mulberry. The design was simple in concept, but both brilliant and complicated in execution. An outer breakwater was built by scuttling large ships on the ocean floor off the shallow beaches, great concrete caissons were also sunk onto the floor, and the floating dock and ramp elements were connected so large ships could dock in deep water and off-load their cargoes, which were then rapidly moved to shore.
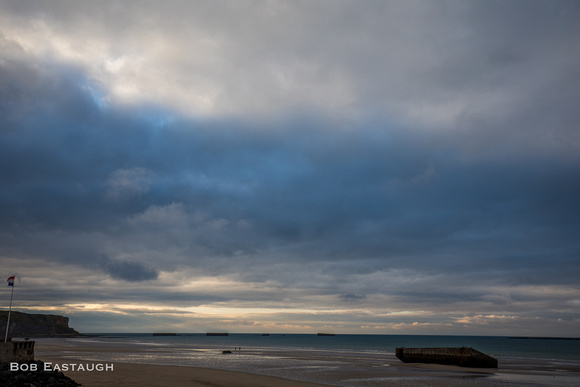
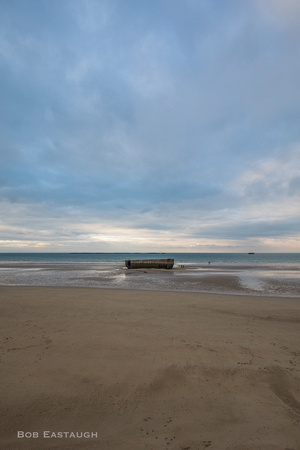
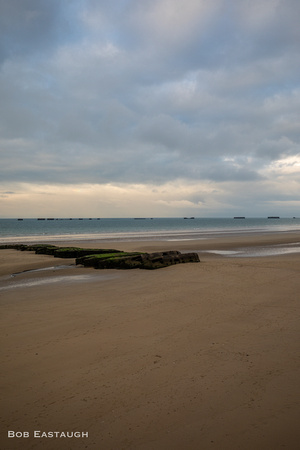
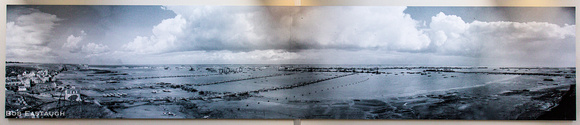
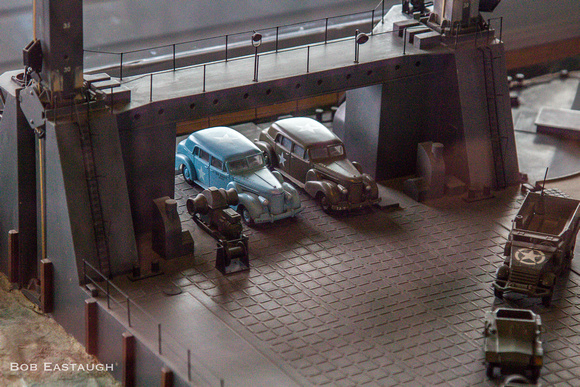
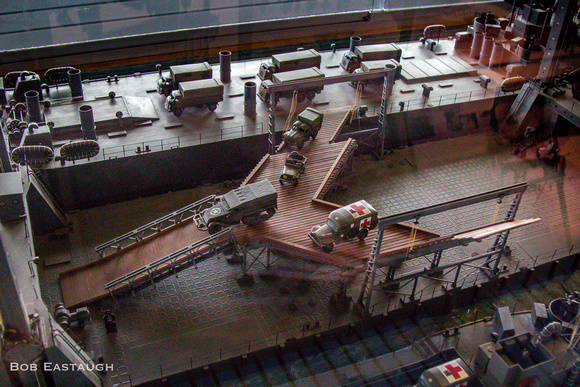
Arromanches and Asnelles were encompassed by the vast British Mulberry. The relics of this harbor are still very visible. An observer on shore can easily see the ships and caissons that formed the outer breakwater and the now-beached floats - Beetles - that buoyed the ramps - the Whales - used by tanks and trucks and men. Arromanches has a fine museum (the Musee du Debarquement) depicting many aspects of the invasion. Its detailed models show how the harbor's elements were towed across the Channel without mishap and how they functioned around the clock despite the great tidal rise and fall and North Atlantic conditions.
The British harbor was used for 10 months after D-Day, although it had only been designed for 90 days of service. More than 2.5 million men, 500,000 vehicles, and 4 million tons of supplies were landed across it. Its magnitude was staggering: 600,000 tons of concrete, 33 jetties, and 10 miles of floating roadways. Scientific American magazine published this link to a short video depicting the construction and use of the British Mulberry at Arromanches: https://blogs.scientificamerican.com/plugged-in/in-arromanches-the-artificial-harbor-that-fed-the-allied-invasion-of-normandy-still-lives/
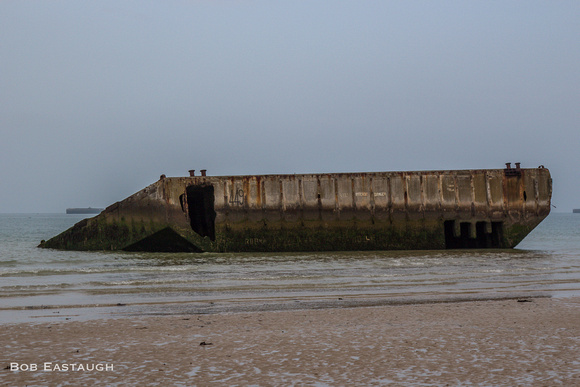

Spud Pier 449, off Arromanches; it floated up and down with the 24-foot tides on spuds (posts) driven into the beach.
L: Spud pier 449
R: Beetles that supported the Whale bridge and roadway components

Whale component (now displayed above Arromanches)
Museum display depicting the completed British Mulberry
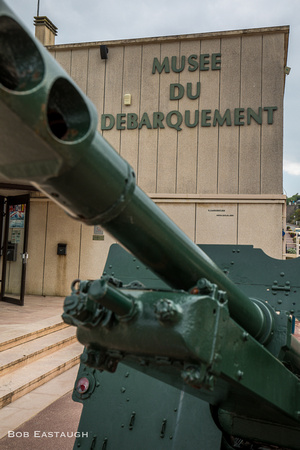
L: British gun frames the fine Musee du Debarquement in Arromanches
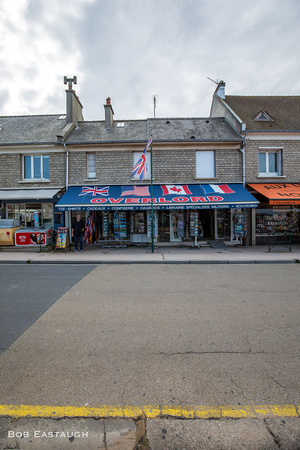
R: Arromanches street scene: one of many D-Day shops near the Musee.
Below: Models in the Musee show the Mulberry in detail.
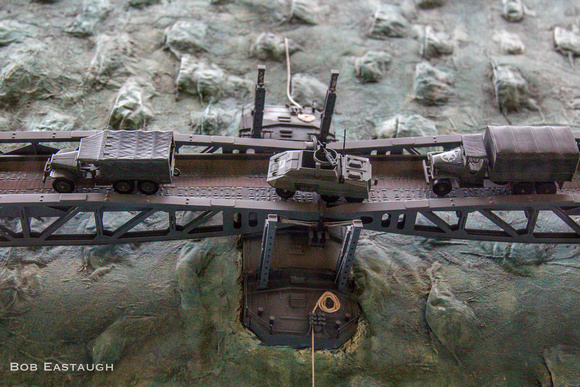
Beetles supported the Whales.
One of the spud piers in operation
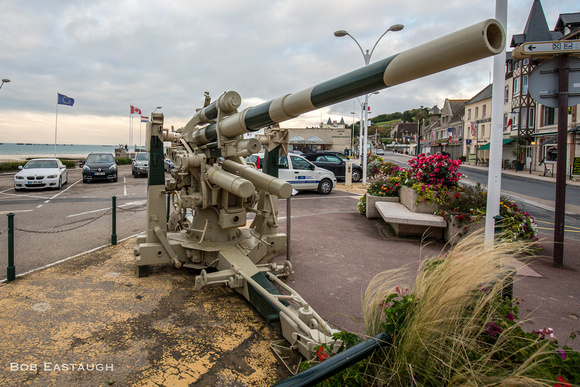
Famed and feared German 88, now displayed in Arromanches. The Musee is visible under the barrel; some of the Mulberry's remains are visible on the coastal horizon.
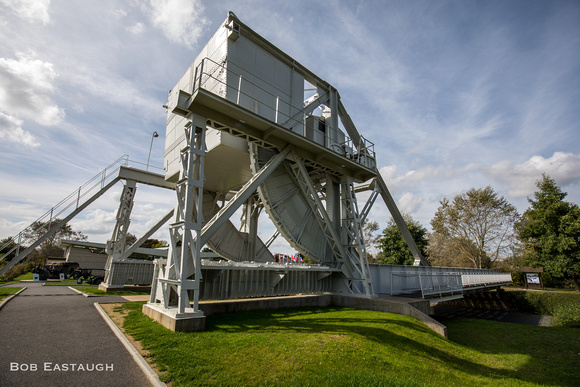
This is the original "Pegasus" bridge that crossed the Orne. Its successful capture by British was memorably depicted in "The Longest Day." When it was replaced recently, it was moved to the nearby Pegasus Museum dedicated to the successful British D-Day effort to capture the bridge before German defenders could set off their emplaced demolition charges.
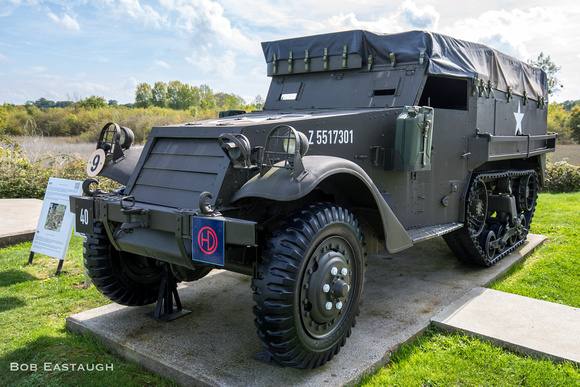
Above: M3 halftrack at Pegasus museum.
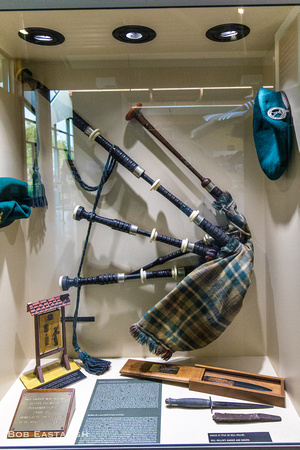
Below: While playing a selection of tunes, Bill Millin, the piper for Lord Lovat, led Lovat's brigade ashore on D-Day and across the bridge when it was captured. Mortar shrapnel eventually damaged his bagpipes. He later donated them to the Pegasus Museum.
Comments

After a lifetime of mainly expressing myself with words, my postings here will mainly rely on images. They will speak for themselves to some extent, but I'll usually add a few comments of explanation. I've taken photographs for decades, since the 1950's, inspired in part by my father's photographic skill. Four years of photo assignments and quality darkroom time eventually gave way to decades of casual and family picture-taking. I re-immersed myself when I left film and turned to digital.